where baking meets the passion for fashion and photography

Tuesday 30 April 2013

Greek Aubergine / Eggplant Salad ~ Μελιτζανοσαλάτα Συνταγή

For the Aubergine / Eggplant salad we will need:

2 aubergines
3 tbsp olive oil
1 1/2 tbsp vinegar
50 gr grated or cut into small pieces feta cheese
1-2 cloves of garlic

We grill the 2 aubergines on the highest grill temperature. When their skin is almlst burned and they are soft we remove them from the oven and peel their skin. With a fork we work them into a puree.  We add the oil, vinegar, garlic, salt and feta cheese and we work it until it is well mixed. We once more decorate accor2 to the theme of our dinner party.
Read More

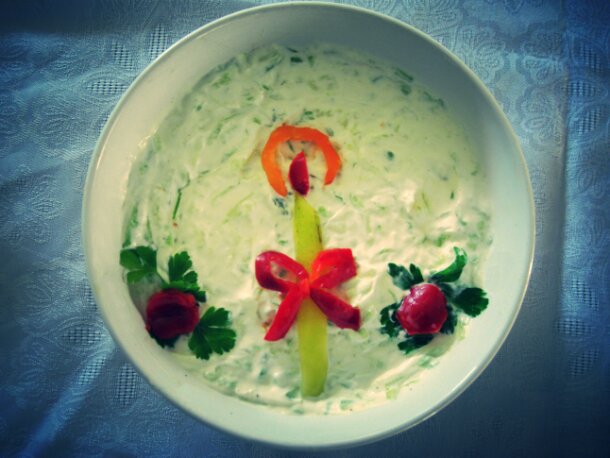
Tzatziki Recipe ~ Τζατζίκι Συνταγή

For the Tzatziki we will need:

0.500g greek style yogurt
1 cucumber
3 tbsp olive oil
1 1/2 tbsp vinegar
1/2 tsp salt
A bit of pepper
1-2 cloves of garlic

In a bowl we mix the oil, vinegar, salt, pepper and the garlic squeezed or chopped in tiny pieces. We peel and grate the cucumber with large holes of the grater. We squeeze the grated cucumber until all its water is out and we mix it with the yogurt mixture. We decorate according to the dinner party theme.
Read More

Monday 29 April 2013

Pink is for Spring ~ Food Styling Ideas

image

My parents love having people for dinner and as I have mentioned before my mum loves styling the dishes and table. Yesterday they had around 15 people for dinner and as always I got sent my mum's creations. I fell in love with the taramosalata not because pink is my favourite colour but also because I loved her decorating idea! I will dedicate this post to food styling but I promise to add recipes for every salad on this page :-)

image

The recipe for this type of Greek Aubergine/Eggplant Salad can be found here
image

image

image
Read More

Sunday 28 April 2013

Puff Pastry Recipe ~ Σφολιάτα Συνταγή

I have tried a couple of puff pastry recipes and I think this one works better in terms of how you work the dough. It's not very difficult but if you have any questions feel free to ask :)

For 1 kg puff pastry we need:
500g flour
500g good quality butter in room temperature
1 cup cold water
1/2 tsp salt

To make the puff pastry we mix the flour, water, salt and 150g of the butter and work the ingredients until we get a workable and soft dough. We cover with a cling film and let it rest in the fridge for 45 minutes. Removing from the fridge we sprinkle some flour on our work space and roll the dough into a rectangle of about 7 mm thick. We cut the remaining butter and form a smaller than our dough rectangle. We then place the butter on top of the dough.

We fold the left and right sides of the dough inwards until their edges meet in the middle of the rectangle as show in the second sketch. The next step is to fold the bottom 1/3 of the dough inwards followed by the top one third as shown in the third and fourth sketches. We leave the dough covered with cling film in the fridge for 30-45 minutes. After it has rested we remove it work the dough carefully on a floured surface into the same rectangular and  follow the same folding process. We leave it to rest again in the fridge for 30-45 minutes and repeat the folding and resting steps 4 more times. After the fourth time we take it out from the fridge and we are ready to roll it and use it.

image

Read More

Butternut Squash on Puff Pastry Stars

image

I first made this recipe for a Christmas dinner in 2012. It was simple and yet full of taste and I loved it since butternut squash is one of my favorite veggies. Back then I made it with ready made puff pastry. Since then I have experimented and made my own and it turned out very successful. Remembering how good the recipe was I decided to make it again but with my own puff pastry. The good thing with all types of pastries is that you can make them in big quantities and then store them in the freezer. Every time you need to use some you just take it out of the freezer in advance.

For the butternut squash topping we need:

1/2 butternut squash
2 onions
100g feta cheese or parmesan
rosemary
1tsp sugar
salt and pepper

For the puff pastry recipe please check my previous post here. For this recipe we need 1/4kg puff pastry.

To make the butternut squash topping we peel and cut the butternut squash into small squares. We then boil them until they are cooked but not very soft as we are going to bake them in the oven along with the puff pastry later on. We cut the onions into slices. In a pan we heat 2-3 tbsp of olive oil in medium to strong heat and then add the onions. When they start getting transparent we sprinkle the sugar. We cook for 2-3 minutes and then add the boiled butternut squash with rosemary, salt and pepper. We stir and cook further for about 3 more minutes and remove from heat. For this recipe we need 1/3 of the puff pastry. We either cut the puff pastry into squares or if we want a more stylish outcome we use medium-big cookie cutters. We place the puff pastry on a oiled or covered with cooking paper baking tray. At this stage we stir in the butternut squash mixture the cheese cut in small cubes and then on each square/shape we spoon our butternut squash mixture.

We preheat the oven at 200C  and bake the butternut squash stars for about 15-20 minutes or until golden.
Read More

Friday 26 April 2013

Mango and Coconut Frozen Yogurt ~ Παγωτό Γιαούρτι με Μάνγκο και Καρύδα

image

Since I was younger I always preferred frozen yogurt ice cream flavours compared to creamy and chocolate ones. For me ice cream is to refresh you and not to bloat you! The craze that has appeared lately with all the frozen yogurt stores has worked to my favour as at last I get a greater choice about my old time favourite summer treat. Few years back when I was looking for frozen yogurt recipes I would end up disappointed by the lack of choice.
At last now I can find articles that give alternatives of the basic recipe on which I can add any flavours I like depending on my mood and my stock.

Two of my favourite ingredients are coconuts and mangos. Frozen yogurt with mango is a flavour that can be widely found in stores. What I sometimes did was order/buy the mango flavour and sprinkle coconut flakes. Since it was winter I didn't consume frozen yogurt or ice creams in big quantities thus I never thought of making.  Now that the sun is out, spring is here and days are getting warmer I get craves for an ice treat almost daily. Not being a fan of processed food I decided to start making my own frozen yogurt. I decided to start with two of my favourite ingredients mango and coconut. I looked for recipes but none was good enough for my liking. Thus as always I used a basic recipe to make my own version. The recipes usually include sugar. Not being a fan of very sweet treats, don't get me wrong I love baking but to be honest I enjoy more the baking process than consuming the baked goods thus I prefer to give them to other people, and wanting to keep the flavour as crisp and natural as possible I used very little sugar and added lemon to give it an extra crispness. I would suggest while you make the mixture try it and accordingly adjust the sugar and add any flavours you like!

Ingredients:
2 ripe mangos
1 cup greek style yogurt
1/2 cup coconut milk
1-5 tbsp sugar
3-5 tbsp coconut flakes
1 lemon

First we peel and dice the mangos. If we want the frozen yogurt to have small bites of fruit we keep half of one mango and cut it into really small cubes. The rest, 1 and a half, we place in a blender until they turn into a smooth cream.  We add the yogurt, coconut milk and the juice of the lemon and we keep processing the mixture.  We then slowly start to add the sugar one tbsp after the other trying in between until it reaches the level of sweetness we like. We pour the mixture into a bowl and then add the coconut flakes and mango small cubes if we had decided we wanted fruit small bites. Whisk the mixture with a spoon and we place the bowl in the freezer for an hour. After the hour we remove it from the freezer and with a spoon we whisk the mixture until it becomes smooth. Place it in the freezer again and leave it for 1 hour and 30 minutes. Remove from the freezer and repeat the whisking process. We leave it in the freezer for another 1 hour and 30 minutes and we again remove it. We whisk it again. What I did at this stage is use plastic baking mice moulds for some of the mixture to create serving decorations. We can also place the mixture in ice lolly moulds. Last stage? Place it in the freezer again until it is completely frozen.

We can serve with fruits of our liking, fresh mint leaves or coconut flakes.

We can also experiment with different fruit. What we have to remember is that every fruit has a different water consistency.  Thus depending on how creamy we want our frozen yogurt to be we have to adjust the yogurt, milk and fruit quantities.

My last suggestion? Enjoy at the garden :)
Read More

Wednesday 24 April 2013

Easter Food Styling

image

The recipe for the Tzatziki can be found here

Easter is a few weeks away in Greece and all of my mum's salad decorations are with the Easter theme.
I will be adding more ideas as she will be making and sending them to me. I know the photos will be coming regularly as she loves hosting dinner parties for friends and her decorated salads are always featured on the table!

image

The recipe of the Greek Aubergine / Eggplant Salad can be found here
Read More

Sunday 21 April 2013

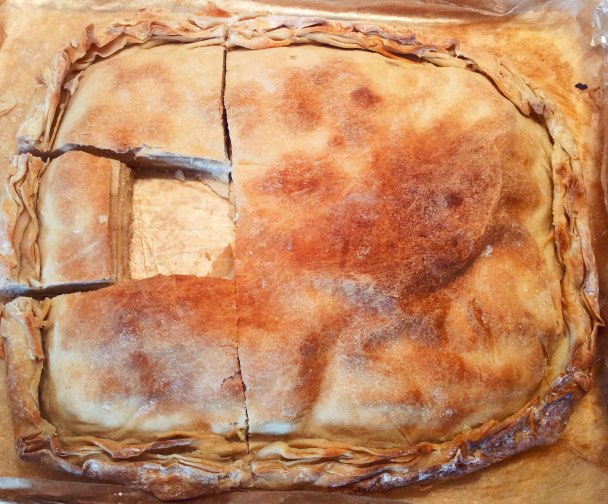
Greek Style Cheese Pie (Tiropita) with Homemade Filo Pastry ~ Τυρόπιτα με Χειροποίητο Φύλλο

image

One of the things I take on my return to the UK from Greece is different types of cheese. Unfortunately because I am a great cheese lover I finish my Greek stock in no time. For this reason I decided to make a cheese pita, put it in the freezer and eat it slowly slowly. Having made puff and croissant pastry from scratch I decided to challenge myself with making filo pastry for the pita.
I may be an expert in other types of baked goods but my hands didn't step up to the challenge and today I woke up with elbow pains. The pita and the filo might have turned out successfully but my filo opening techniques need development to save my arms! The whole process made me appreciate my grandmother and my mum's aunts more as now understanding the effort required for every pita I realise that they sure did me a huge favour when meeting my pita requests. I am sure that with practice I will get better and if I do it right I won't suffer at all. For the moment I will give my arms and hands a rest!

I surely encourage everyone to try as you will come to realise that ready made filo has nothing to do with the real thing!

Ingredients:
For the filo:
750 g all purpose flour
2 tbsp white vinegar
3/4 cup olive oil
1 1/3 cup warm water
1 tsp salt
Cornstarch for opening the filo
Olive oil for the filo
For the filling:
850g mixture of cheeses (I used feta and dry anthotiro which is cheese only found in Greece)
2 eggs
Salt
Pepper

In a large bowl we empty the dry ingredients for the filo. We make a hole in the middle and pure the liquid ingredients. We mix and work the mixturebuntil it becomes an elastic, workable dough. If necessary we add water or flour. We leave the dough to rest in the fridge for an hour.
After the hour we divide the dough in two balls. With a rolling pin we work each ball until it becomes a relatively thin round pastry. One trick my aunt has taught me and I have also come across a lot for easy filo is the following. We cut the circle into the following shapes

image

We spread oil on its part and we place them one on top of the other. We then proceed in working the pile into a filo a bit bigger than our baking tray. The thinner the better!
We repeat the process for the other dough ball.
For the mixture we grate the cheese, beat the eggs and mix the two. We then add pepper.
We oil our bakimg tray and place the filo. We spread the filling evenly leaving space in the margins to twist the edges of the two filos and secure the filling in. We place the other filo on top and then secure the edges by twisting the filos inwards.
We preheat the oven at 180C and bake for 40 minutes.

Our Greek style cheese pie is ready!

We can play around with different filings according to our liking! Enjoy and have fun with it!
Read More

Saturday 20 April 2013

Tomato Basket Salad ~ Σαλάτα με Καλαθάκια Ντομάτας

[caption id="" align="aligncenter" width="660" caption="Food styling, salad styling, tomato basket salad, σαλάτα μρ καλαθάκια ντομάτας"]image[/caption]


With a table full of different dishes it is difficult to have space for flowers or any other types of decoration. Now that spring is here it is getting more and more tempting to squeeze a vase full of flowers to decorate our tables.
As we were preparing a table for 12 people with my aunt while I was in sunny Greece she suggested I make a Tomato Basket Salad. It's a very simple idea that shows that with a little bit of imagination simple ingredients can be turned into something unique and stunning.

For the Tomato Salad Basket we used:
12 medium round tomatoes
2 green peppers
3 lettuce leaves
3 different (or as many as we want) dips or spread salads such as coleslaw
some parsley for decoration

We cut the top part of the tomatoes and with a small spoon we empty the inner part of the tomatoes. We don't throw the inner part of the tomatoes. We keep it in the fridge or the freezer and use to make tomato sauce.
We fill each tomato with a different dip or salad. We slice the peppers and make a cut on one side and use the pepper as a handle for the tomato basket. We decorate each basket with a few parsley leaves.

Summer being my favourite season the challenge for me now is to find food styling ideas perfect for the summer!
Read More

Tuesday 16 April 2013

xrisougenna 2011 176

xrisougenna 2011 176
Read More

Lemon Meringue Cupcakes ~ Cupcake με Λεμόνι και Μαρέγκα

image


One of my favourite ingredients is lemon! I have been craving lemon cupcakes for a while and knowing that my family will want to take advantage of my Baking skills I decided to wait and bake them when I would be in Greece.
Due to my love and trust in Hummingbird Bakery recipes I decided to look up for their version of lemon cupcakes. After searching when I saw the word meringue on the title I panicked as I know how high the chances for meringue failure are.  As I was going through the recipe I felt I was being asked to accept a bigger challenge since some of the details seemed wrong. I had to double and triple check online for meringue recipes and I realised that all of them were identical. The following recipe is the mixture of the recipes I looked into and I highly recommend it!

Ingredients :

For the cupcakes:
75gr unsalted butter
270gr sugar
250gr flour
1 1/2 tsp baking powder
1/4 tsp salt
1 tsp Vanilla essence
Zest from 2 lemons
2 large eggs
250ml milk
Lemon curd

For the meringue:
100gr caster sugar
2 egg whites

We beat the butter and the sugar until we get a fluffy mixture. We add the eggs one by one and we continue beating in the mixer on high speed for about 5 minutes.
In a separate bowl we mix the flour, baking powder and salt.
We add into the butter mixture one quarter of the flour mixture and one quarter of the milk. We continue beating until all the ingredients mix well. We repeat the process for every quarter of flour mixture and milk. Finally we add the lemon Zest dn vanilla essence.
We pour the mixture in the muffin trays after we have laid cupcake cups.

We preheat the oven at 180 C and we bake for about 20-25 minutes or until golden.

Now onto the scary part. While the cupcakes are in the oven we prepare the meringue. We beat the eggs in the mixer on high speed until they turn into a solid meringue former. The mixer bowl we will use has to be clean and completely dry.
We pour the caster sugar in a separate pan and we just about cover it with water. We bring the mixture to boil and when it starts to thicken, being careful not to overboil it and let it get a brown colour as that will make it turn bitter, we switch on the mixer on high speed and as it is boiling hot we pour the caramel into the beaten egg whites. We continue beating until the mixture starts to cool down.

We remove the cupcakes from the oven and wait until they cool down. With a spoon we create a small hole on the top of the cupcake and we fill with 1/2tsp lemon curd. At the end we decorate with the meringue. Once decorated we place the cupcakes on the highest rack of the oven and having turned on the grill on maximum we wait until the top gets burned a bit and then we remove from the oven.

Our cupcakes are ready to enjoy!
Read More

Sunday 14 April 2013

Light Olive Bread with Orange Juice ~ Νηστίσιμο Ελιόψωμο με ΧυμόΠορτοκαλιού

image


Another characteristic of Greek food culture is the great variety in vegetarian dishes due to long fasting periods within Greek orthodox culture. The ingredients that are allowed within fasting periods are very specific and exactly because Greeks are great lovers of good food many alternative recipes exist to substitute basic Greek food craves.

Right now we are going through the 40 days of orthodox lent and with my aunt we decided to try an Olive Bread recipe my aunt saw in a cooking show. I was surprised to see that with 3 simple ingredients for the dough and 3 simple ingredients for the filling you can get a full of taste lighter result that can very well substitute the common to all Olive Bread. I would recommend the recipe not only to those that are fasting but also to those that are either dieting or are not great fans of bread.

Ingredients
For the dough:
1 cup good quality olive oil
1 cup fresh orange juice
1/2 kg wholemeal flour
For the filling:
200gr olives
200gr onion
15gr fresh mint

In a bowl we mix the olive oil, orange juice and we slowly start to add the flour while we continue to mix. We add as much flour to create a workable dough. We leave the dough to rest in the fridge for an hour.

We chop the olives, onions and mint and mix them.

We divide the dough in three parts. On baking paper we work the dough into a 4mm rectangular shape. We divide the filling into three parts. With a spoon we spread one third of the mixture on the rectangular dough. With the help of the baking paper we roll the dough.

We oil a baking tray and after placing the Olive Breads we bake them in a 180 C preheated oven for an hour
Read More

Friday 12 April 2013

Salmon and Potato Tart

image


This is a recipe I have learned from my Aunt Eva. Ten years ago a habit started within the family that kept growing and has now been established as a family tradition. Every Wednesday the immediate family along with dear friends gather at my Aunt's and Uncle's house for ouzo and mezedes. The Ouzo Night started with the presence of my Aunt, Uncle, Parents and Sister and as the group started to slowly grow it can reach up to 25 people.
Feeding 12–25 people every Wednesday evening can be a bit of a challenge not only in relation to the amount of food but also to the variety and presentation of dishes.
From all the recipes and dishes that have been tried and tested the Salmon Tart has become on of the crowd's favourites. This week my Aunt suggested I make it so that I post it on my Baking and Cooking blog.
The recipe is very simple and the flavours of the different ingredients mix excellently giving a very light and refreshing dish.

Ingredients
4 medium potatoes
5 leaves of lettuce
1 spring onion
Some fresh dill
1 pack of Philadelphia cream cheese
6 slices of smoked salmon
Juice from one lemon
Zest from one lemon
Olive oil
Salt

We peel and boil the potatoes for about 10 minutes or until they are cooked without letting them get too soft. Drain them and with a fork smash them to get a puree. Do not use a food processor as the puree needs to have a rough consistency.
Cut the lettuce, dill and spring onions into small pieces and in a bowl mix them with oil, lemon juice and salt.
Place a medium sized springform pan on a plate and spread the potatoe puree as the first layer. Spread the lettuce mixture as the second layer and carefully spread the cream cheese as your third layer. Finally place evenly the salmon slices and decorated with some lettuce or dill. Sprinkle the lemon Zest on top.
Leave the Tart to cool for half an hour in the fridge. Before serving remove the springform carefully. If necessary use a knife to detach the Tart from the sides of the springform.
Read More

Food Styling ~ Salads

image

For the Tzatziki recipe click here
image

Apart from the love towards well cooked food my Mum also taught me the huge role presentation plays for the appreciation of excellent cooking and baking skills. The love she puts in her cooking and baking, no matter how simple the dish is, is apparent before the first bite.
Since I was young she would decorate each of our meals with unique shapes, images and patterns using any ingredient she had available in the fridge and cupboards. Sometimes she would leave a sweet message through her food styling or would add a festive accent through the food styling to the table.

Her ideas are simple, easy to make and very impressive!
image

image

image

For the Greek Aubergine Salad recipe click here
Read More

Tuesday 30 April 2013

Greek Aubergine / Eggplant Salad ~ Μελιτζανοσαλάτα Συνταγή

For the Aubergine / Eggplant salad we will need:

2 aubergines
3 tbsp olive oil
1 1/2 tbsp vinegar
50 gr grated or cut into small pieces feta cheese
1-2 cloves of garlic

We grill the 2 aubergines on the highest grill temperature. When their skin is almlst burned and they are soft we remove them from the oven and peel their skin. With a fork we work them into a puree.  We add the oil, vinegar, garlic, salt and feta cheese and we work it until it is well mixed. We once more decorate accor2 to the theme of our dinner party.

Tzatziki Recipe ~ Τζατζίκι Συνταγή

For the Tzatziki we will need:

0.500g greek style yogurt
1 cucumber
3 tbsp olive oil
1 1/2 tbsp vinegar
1/2 tsp salt
A bit of pepper
1-2 cloves of garlic

In a bowl we mix the oil, vinegar, salt, pepper and the garlic squeezed or chopped in tiny pieces. We peel and grate the cucumber with large holes of the grater. We squeeze the grated cucumber until all its water is out and we mix it with the yogurt mixture. We decorate according to the dinner party theme.

Monday 29 April 2013

Pink is for Spring ~ Food Styling Ideas

image

My parents love having people for dinner and as I have mentioned before my mum loves styling the dishes and table. Yesterday they had around 15 people for dinner and as always I got sent my mum's creations. I fell in love with the taramosalata not because pink is my favourite colour but also because I loved her decorating idea! I will dedicate this post to food styling but I promise to add recipes for every salad on this page :-)

image

The recipe for this type of Greek Aubergine/Eggplant Salad can be found here
image

image

image

Sunday 28 April 2013

Puff Pastry Recipe ~ Σφολιάτα Συνταγή

I have tried a couple of puff pastry recipes and I think this one works better in terms of how you work the dough. It's not very difficult but if you have any questions feel free to ask :)

For 1 kg puff pastry we need:
500g flour
500g good quality butter in room temperature
1 cup cold water
1/2 tsp salt

To make the puff pastry we mix the flour, water, salt and 150g of the butter and work the ingredients until we get a workable and soft dough. We cover with a cling film and let it rest in the fridge for 45 minutes. Removing from the fridge we sprinkle some flour on our work space and roll the dough into a rectangle of about 7 mm thick. We cut the remaining butter and form a smaller than our dough rectangle. We then place the butter on top of the dough.

We fold the left and right sides of the dough inwards until their edges meet in the middle of the rectangle as show in the second sketch. The next step is to fold the bottom 1/3 of the dough inwards followed by the top one third as shown in the third and fourth sketches. We leave the dough covered with cling film in the fridge for 30-45 minutes. After it has rested we remove it work the dough carefully on a floured surface into the same rectangular and  follow the same folding process. We leave it to rest again in the fridge for 30-45 minutes and repeat the folding and resting steps 4 more times. After the fourth time we take it out from the fridge and we are ready to roll it and use it.

image

Butternut Squash on Puff Pastry Stars

image

I first made this recipe for a Christmas dinner in 2012. It was simple and yet full of taste and I loved it since butternut squash is one of my favorite veggies. Back then I made it with ready made puff pastry. Since then I have experimented and made my own and it turned out very successful. Remembering how good the recipe was I decided to make it again but with my own puff pastry. The good thing with all types of pastries is that you can make them in big quantities and then store them in the freezer. Every time you need to use some you just take it out of the freezer in advance.

For the butternut squash topping we need:

1/2 butternut squash
2 onions
100g feta cheese or parmesan
rosemary
1tsp sugar
salt and pepper

For the puff pastry recipe please check my previous post here. For this recipe we need 1/4kg puff pastry.

To make the butternut squash topping we peel and cut the butternut squash into small squares. We then boil them until they are cooked but not very soft as we are going to bake them in the oven along with the puff pastry later on. We cut the onions into slices. In a pan we heat 2-3 tbsp of olive oil in medium to strong heat and then add the onions. When they start getting transparent we sprinkle the sugar. We cook for 2-3 minutes and then add the boiled butternut squash with rosemary, salt and pepper. We stir and cook further for about 3 more minutes and remove from heat. For this recipe we need 1/3 of the puff pastry. We either cut the puff pastry into squares or if we want a more stylish outcome we use medium-big cookie cutters. We place the puff pastry on a oiled or covered with cooking paper baking tray. At this stage we stir in the butternut squash mixture the cheese cut in small cubes and then on each square/shape we spoon our butternut squash mixture.

We preheat the oven at 200C  and bake the butternut squash stars for about 15-20 minutes or until golden.

Friday 26 April 2013

Mango and Coconut Frozen Yogurt ~ Παγωτό Γιαούρτι με Μάνγκο και Καρύδα

image

Since I was younger I always preferred frozen yogurt ice cream flavours compared to creamy and chocolate ones. For me ice cream is to refresh you and not to bloat you! The craze that has appeared lately with all the frozen yogurt stores has worked to my favour as at last I get a greater choice about my old time favourite summer treat. Few years back when I was looking for frozen yogurt recipes I would end up disappointed by the lack of choice.
At last now I can find articles that give alternatives of the basic recipe on which I can add any flavours I like depending on my mood and my stock.

Two of my favourite ingredients are coconuts and mangos. Frozen yogurt with mango is a flavour that can be widely found in stores. What I sometimes did was order/buy the mango flavour and sprinkle coconut flakes. Since it was winter I didn't consume frozen yogurt or ice creams in big quantities thus I never thought of making.  Now that the sun is out, spring is here and days are getting warmer I get craves for an ice treat almost daily. Not being a fan of processed food I decided to start making my own frozen yogurt. I decided to start with two of my favourite ingredients mango and coconut. I looked for recipes but none was good enough for my liking. Thus as always I used a basic recipe to make my own version. The recipes usually include sugar. Not being a fan of very sweet treats, don't get me wrong I love baking but to be honest I enjoy more the baking process than consuming the baked goods thus I prefer to give them to other people, and wanting to keep the flavour as crisp and natural as possible I used very little sugar and added lemon to give it an extra crispness. I would suggest while you make the mixture try it and accordingly adjust the sugar and add any flavours you like!

Ingredients:
2 ripe mangos
1 cup greek style yogurt
1/2 cup coconut milk
1-5 tbsp sugar
3-5 tbsp coconut flakes
1 lemon

First we peel and dice the mangos. If we want the frozen yogurt to have small bites of fruit we keep half of one mango and cut it into really small cubes. The rest, 1 and a half, we place in a blender until they turn into a smooth cream.  We add the yogurt, coconut milk and the juice of the lemon and we keep processing the mixture.  We then slowly start to add the sugar one tbsp after the other trying in between until it reaches the level of sweetness we like. We pour the mixture into a bowl and then add the coconut flakes and mango small cubes if we had decided we wanted fruit small bites. Whisk the mixture with a spoon and we place the bowl in the freezer for an hour. After the hour we remove it from the freezer and with a spoon we whisk the mixture until it becomes smooth. Place it in the freezer again and leave it for 1 hour and 30 minutes. Remove from the freezer and repeat the whisking process. We leave it in the freezer for another 1 hour and 30 minutes and we again remove it. We whisk it again. What I did at this stage is use plastic baking mice moulds for some of the mixture to create serving decorations. We can also place the mixture in ice lolly moulds. Last stage? Place it in the freezer again until it is completely frozen.

We can serve with fruits of our liking, fresh mint leaves or coconut flakes.

We can also experiment with different fruit. What we have to remember is that every fruit has a different water consistency.  Thus depending on how creamy we want our frozen yogurt to be we have to adjust the yogurt, milk and fruit quantities.

My last suggestion? Enjoy at the garden :)

Wednesday 24 April 2013

Easter Food Styling

image

The recipe for the Tzatziki can be found here

Easter is a few weeks away in Greece and all of my mum's salad decorations are with the Easter theme.
I will be adding more ideas as she will be making and sending them to me. I know the photos will be coming regularly as she loves hosting dinner parties for friends and her decorated salads are always featured on the table!

image

The recipe of the Greek Aubergine / Eggplant Salad can be found here

Sunday 21 April 2013

Greek Style Cheese Pie (Tiropita) with Homemade Filo Pastry ~ Τυρόπιτα με Χειροποίητο Φύλλο

image

One of the things I take on my return to the UK from Greece is different types of cheese. Unfortunately because I am a great cheese lover I finish my Greek stock in no time. For this reason I decided to make a cheese pita, put it in the freezer and eat it slowly slowly. Having made puff and croissant pastry from scratch I decided to challenge myself with making filo pastry for the pita.
I may be an expert in other types of baked goods but my hands didn't step up to the challenge and today I woke up with elbow pains. The pita and the filo might have turned out successfully but my filo opening techniques need development to save my arms! The whole process made me appreciate my grandmother and my mum's aunts more as now understanding the effort required for every pita I realise that they sure did me a huge favour when meeting my pita requests. I am sure that with practice I will get better and if I do it right I won't suffer at all. For the moment I will give my arms and hands a rest!

I surely encourage everyone to try as you will come to realise that ready made filo has nothing to do with the real thing!

Ingredients:
For the filo:
750 g all purpose flour
2 tbsp white vinegar
3/4 cup olive oil
1 1/3 cup warm water
1 tsp salt
Cornstarch for opening the filo
Olive oil for the filo
For the filling:
850g mixture of cheeses (I used feta and dry anthotiro which is cheese only found in Greece)
2 eggs
Salt
Pepper

In a large bowl we empty the dry ingredients for the filo. We make a hole in the middle and pure the liquid ingredients. We mix and work the mixturebuntil it becomes an elastic, workable dough. If necessary we add water or flour. We leave the dough to rest in the fridge for an hour.
After the hour we divide the dough in two balls. With a rolling pin we work each ball until it becomes a relatively thin round pastry. One trick my aunt has taught me and I have also come across a lot for easy filo is the following. We cut the circle into the following shapes

image

We spread oil on its part and we place them one on top of the other. We then proceed in working the pile into a filo a bit bigger than our baking tray. The thinner the better!
We repeat the process for the other dough ball.
For the mixture we grate the cheese, beat the eggs and mix the two. We then add pepper.
We oil our bakimg tray and place the filo. We spread the filling evenly leaving space in the margins to twist the edges of the two filos and secure the filling in. We place the other filo on top and then secure the edges by twisting the filos inwards.
We preheat the oven at 180C and bake for 40 minutes.

Our Greek style cheese pie is ready!

We can play around with different filings according to our liking! Enjoy and have fun with it!

Saturday 20 April 2013

Tomato Basket Salad ~ Σαλάτα με Καλαθάκια Ντομάτας

[caption id="" align="aligncenter" width="660" caption="Food styling, salad styling, tomato basket salad, σαλάτα μρ καλαθάκια ντομάτας"]image[/caption]


With a table full of different dishes it is difficult to have space for flowers or any other types of decoration. Now that spring is here it is getting more and more tempting to squeeze a vase full of flowers to decorate our tables.
As we were preparing a table for 12 people with my aunt while I was in sunny Greece she suggested I make a Tomato Basket Salad. It's a very simple idea that shows that with a little bit of imagination simple ingredients can be turned into something unique and stunning.

For the Tomato Salad Basket we used:
12 medium round tomatoes
2 green peppers
3 lettuce leaves
3 different (or as many as we want) dips or spread salads such as coleslaw
some parsley for decoration

We cut the top part of the tomatoes and with a small spoon we empty the inner part of the tomatoes. We don't throw the inner part of the tomatoes. We keep it in the fridge or the freezer and use to make tomato sauce.
We fill each tomato with a different dip or salad. We slice the peppers and make a cut on one side and use the pepper as a handle for the tomato basket. We decorate each basket with a few parsley leaves.

Summer being my favourite season the challenge for me now is to find food styling ideas perfect for the summer!

Tuesday 16 April 2013

xrisougenna 2011 176

xrisougenna 2011 176

Lemon Meringue Cupcakes ~ Cupcake με Λεμόνι και Μαρέγκα

image


One of my favourite ingredients is lemon! I have been craving lemon cupcakes for a while and knowing that my family will want to take advantage of my Baking skills I decided to wait and bake them when I would be in Greece.
Due to my love and trust in Hummingbird Bakery recipes I decided to look up for their version of lemon cupcakes. After searching when I saw the word meringue on the title I panicked as I know how high the chances for meringue failure are.  As I was going through the recipe I felt I was being asked to accept a bigger challenge since some of the details seemed wrong. I had to double and triple check online for meringue recipes and I realised that all of them were identical. The following recipe is the mixture of the recipes I looked into and I highly recommend it!

Ingredients :

For the cupcakes:
75gr unsalted butter
270gr sugar
250gr flour
1 1/2 tsp baking powder
1/4 tsp salt
1 tsp Vanilla essence
Zest from 2 lemons
2 large eggs
250ml milk
Lemon curd

For the meringue:
100gr caster sugar
2 egg whites

We beat the butter and the sugar until we get a fluffy mixture. We add the eggs one by one and we continue beating in the mixer on high speed for about 5 minutes.
In a separate bowl we mix the flour, baking powder and salt.
We add into the butter mixture one quarter of the flour mixture and one quarter of the milk. We continue beating until all the ingredients mix well. We repeat the process for every quarter of flour mixture and milk. Finally we add the lemon Zest dn vanilla essence.
We pour the mixture in the muffin trays after we have laid cupcake cups.

We preheat the oven at 180 C and we bake for about 20-25 minutes or until golden.

Now onto the scary part. While the cupcakes are in the oven we prepare the meringue. We beat the eggs in the mixer on high speed until they turn into a solid meringue former. The mixer bowl we will use has to be clean and completely dry.
We pour the caster sugar in a separate pan and we just about cover it with water. We bring the mixture to boil and when it starts to thicken, being careful not to overboil it and let it get a brown colour as that will make it turn bitter, we switch on the mixer on high speed and as it is boiling hot we pour the caramel into the beaten egg whites. We continue beating until the mixture starts to cool down.

We remove the cupcakes from the oven and wait until they cool down. With a spoon we create a small hole on the top of the cupcake and we fill with 1/2tsp lemon curd. At the end we decorate with the meringue. Once decorated we place the cupcakes on the highest rack of the oven and having turned on the grill on maximum we wait until the top gets burned a bit and then we remove from the oven.

Our cupcakes are ready to enjoy!

Sunday 14 April 2013

Light Olive Bread with Orange Juice ~ Νηστίσιμο Ελιόψωμο με ΧυμόΠορτοκαλιού

image


Another characteristic of Greek food culture is the great variety in vegetarian dishes due to long fasting periods within Greek orthodox culture. The ingredients that are allowed within fasting periods are very specific and exactly because Greeks are great lovers of good food many alternative recipes exist to substitute basic Greek food craves.

Right now we are going through the 40 days of orthodox lent and with my aunt we decided to try an Olive Bread recipe my aunt saw in a cooking show. I was surprised to see that with 3 simple ingredients for the dough and 3 simple ingredients for the filling you can get a full of taste lighter result that can very well substitute the common to all Olive Bread. I would recommend the recipe not only to those that are fasting but also to those that are either dieting or are not great fans of bread.

Ingredients
For the dough:
1 cup good quality olive oil
1 cup fresh orange juice
1/2 kg wholemeal flour
For the filling:
200gr olives
200gr onion
15gr fresh mint

In a bowl we mix the olive oil, orange juice and we slowly start to add the flour while we continue to mix. We add as much flour to create a workable dough. We leave the dough to rest in the fridge for an hour.

We chop the olives, onions and mint and mix them.

We divide the dough in three parts. On baking paper we work the dough into a 4mm rectangular shape. We divide the filling into three parts. With a spoon we spread one third of the mixture on the rectangular dough. With the help of the baking paper we roll the dough.

We oil a baking tray and after placing the Olive Breads we bake them in a 180 C preheated oven for an hour

Friday 12 April 2013

Salmon and Potato Tart

image


This is a recipe I have learned from my Aunt Eva. Ten years ago a habit started within the family that kept growing and has now been established as a family tradition. Every Wednesday the immediate family along with dear friends gather at my Aunt's and Uncle's house for ouzo and mezedes. The Ouzo Night started with the presence of my Aunt, Uncle, Parents and Sister and as the group started to slowly grow it can reach up to 25 people.
Feeding 12–25 people every Wednesday evening can be a bit of a challenge not only in relation to the amount of food but also to the variety and presentation of dishes.
From all the recipes and dishes that have been tried and tested the Salmon Tart has become on of the crowd's favourites. This week my Aunt suggested I make it so that I post it on my Baking and Cooking blog.
The recipe is very simple and the flavours of the different ingredients mix excellently giving a very light and refreshing dish.

Ingredients
4 medium potatoes
5 leaves of lettuce
1 spring onion
Some fresh dill
1 pack of Philadelphia cream cheese
6 slices of smoked salmon
Juice from one lemon
Zest from one lemon
Olive oil
Salt

We peel and boil the potatoes for about 10 minutes or until they are cooked without letting them get too soft. Drain them and with a fork smash them to get a puree. Do not use a food processor as the puree needs to have a rough consistency.
Cut the lettuce, dill and spring onions into small pieces and in a bowl mix them with oil, lemon juice and salt.
Place a medium sized springform pan on a plate and spread the potatoe puree as the first layer. Spread the lettuce mixture as the second layer and carefully spread the cream cheese as your third layer. Finally place evenly the salmon slices and decorated with some lettuce or dill. Sprinkle the lemon Zest on top.
Leave the Tart to cool for half an hour in the fridge. Before serving remove the springform carefully. If necessary use a knife to detach the Tart from the sides of the springform.

Food Styling ~ Salads

image

For the Tzatziki recipe click here
image

Apart from the love towards well cooked food my Mum also taught me the huge role presentation plays for the appreciation of excellent cooking and baking skills. The love she puts in her cooking and baking, no matter how simple the dish is, is apparent before the first bite.
Since I was young she would decorate each of our meals with unique shapes, images and patterns using any ingredient she had available in the fridge and cupboards. Sometimes she would leave a sweet message through her food styling or would add a festive accent through the food styling to the table.

Her ideas are simple, easy to make and very impressive!
image

image

image

For the Greek Aubergine Salad recipe click here

Featured Posts

© 2011 Kurkubini, AllRightsReserved.

Designed by ScreenWritersArena